Self-Hostember #6: Pocket ID
Table of Contents
ℹ️ This post is part of a series , and it assumes that you’ve followed the instructions from Day Zero first.
Introduction
In previous posts we’ve installed more immediately useful applications. Today, we will focus on something that will pay off for future posts: an OIDC provider.
OIDC, or OpenID Connect , is a protocol built on top of OAuth 2.0 to handle authentication. These are fancy words to say that it solves the problem of signing up to a service without depending on them for your web identity. Sort of a personal single-sign-on (SSO).
Fun fact: OpenID came out of the Livejournal project, which was led by Brad Fitzpatrick - who’s been quite prolific in the open source world. Apart from OpenID, he also helped create memcached (a popular caching service) and Gearman (a less popular distributed task scheduler).
Okay, back to today’s business: OIDC allows us to reuse one identity across multiple services without proxying through identity providers like Apple, Google or Facebook.
OIDC has three main parties involved:
- You, the owner of the identity who wants to authenticate to some service
- Identity Provider (IdP), the service that stores your identity and responds to authentication requests. This is what we will be installing today.
- Relying Party (RP), the service that you want to authenticate into.
The service (relying party) you are signing up to has to support the OIDC protocol for you to be able to use it, but we will encounter some of them in this series. In fact, we already did encounter one: Copyparty! . Copyparty, true to its maximalist form, also supports OIDC as an auth mechanism - so this can be immediately useful too.
For services that you run (and why won’t you, especially when it’s #Self-Hostember) without built-in OIDC support, we can use something called an Oauth Proxy service. This is an OIDC-aware service that sits in front of your non-OIDC service and takes care of authenticating the user. An example is TinyAuth
.
About Pocket ID
But first, let’s talk about the Identity Provider we’ll install today: Pocket ID! . It describes itself as:
a simple OIDC provider that allows users to authenticate with their passkeys to your services.
There are many options in this space to choose from (Authentik, Authelia, Zitadel etc.) so why are we choosing this one? One reason: simplicity and passkeys. I guess two reasons, technically.
Other providers are too feature-rich to be simple for single-person or a flat-hierarchy situation. Pocket ID is designed to fill that exact gap so that you and your OIDC-enthusiast friends and family can own their auth without going crazy in deep configuration pages.
A Note about Passkeys
Pocket ID has one more quirk: it only supports Passkeys as the authentication factor. No passwords, TOTP or U2F tokens (unless they are passkey compatible, of course).
You will need a Passkey authenticator to work with this. You have many options to choose from: any modern phone or computer with a TPM can be one, and so can password managers like 1password and hardware security keys (e.g. Yubikey) . Regardless of whatever authenticator you choose, we recommend having two different authenticators configured, in case one is misplaced so that you are not locked out of your accounts so easily.
You will also need a modern browser that supports WebAuthn, but all major browsers have had support for it for a while. (In Firefox it is a bit rough around the edges but getting better).
We (Colocataires , in case you have lost your way to this page somehow) run Pocket ID internally to authenticate the two of us to our internal services like metrics dashboards and etc.
Okay that was quite a lot of faff to start off an already boring post. Let’s get started.
Install Pocket ID with Docker
Like other services so far, we’ll continue using Docker to deploy our services. We’ll use the docker-compose.yml from the official docs . Let’s create our folders first.
mkdir -p pocketid/data # data will be used for the app data
cd pocketid
And let’s create an encryption key we will need in the next step:
openssl rand -base64 32 > enc_key
And now let’s create our .env and docker-compose.yml files, adapted from the official ones:
cat > .env <<EOF
# See the documentation for more information: https://pocket-id.org/docs/configuration/environment-variables

# Change to your domain name as configured in caddy
APP_URL=https://auth.sh.pawan.link

# We created this in the previous step
ENCRYPTION_KEY_FILE=./enc_key

# We are behind caddy so we set this to true
TRUST_PROXY=true

# We leave these as recommended
PUID=1000
PGID=1000
EOF

cat > docker-compose.yml <<EOF
services:
  pocket-id:
    image: ghcr.io/pocket-id/pocket-id:v1
    restart: unless-stopped
    env_file: .env
    ports:
      - 127.0.0.1:1411:1411
    volumes:
      - "./data:/app/data"
      - "./enc_key:/app/enc_key"
    # Optional healthcheck
    healthcheck:
      test: [ "CMD", "/app/pocket-id", "healthcheck" ]
      interval: 1m30s
      timeout: 5s
      retries: 2
      start_period: 10s
EOF
Now your directory should look like:
pawan@playground:~/s/pocketid$ tree -a
.
|-- .env
|-- data
|-- docker-compose.yml
`-- enc_key
And let’s spin up the container:
docker compose up -d
We should see the container up and running:
pawan@playground:~/s/pocketid$ docker ps
CONTAINER ID   IMAGE                            COMMAND                  CREATED              STATUS                        PORTS                      NAMES
a034b51dd122   ghcr.io/pocket-id/pocket-id:v1   "/app/docker/entrypo…"   About a minute ago   Up About a minute (healthy)   127.0.0.1:1411->1411/tcp   pocketid-pocket-id-1
Let’s not forget to add the Caddyfile directive for the domain:
*.sh.pawan.link, sh.pawan.link {
        tls {
                # Change this to match your DNS provider
                dns cloudflare {env.CLOUDFLARE_TOKEN}
        }

        @auth host auth.sh.pawan.link
        handle @auth {
                reverse_proxy 127.0.0.1:1411
        }
}
And restart caddy to apply the changes:
sudo systemctl restart caddy
Setting up Pocket ID
Okay, now we should be able to access the Pocket ID instance at the domain we configured.
We should hit the setup page first to get set up: <domain>/setup. You’ll be asked to fill out your details, and then asked to create a passkey. Make sure your authenticator is accessible to the browser at this moment, i.e. have your Yubikey plugged in, or do the setup over your phone if you want to use your phone to create passkeys. (You can skip passkey creation and do that after but it’s best to do it as early as possible to not leave things open).

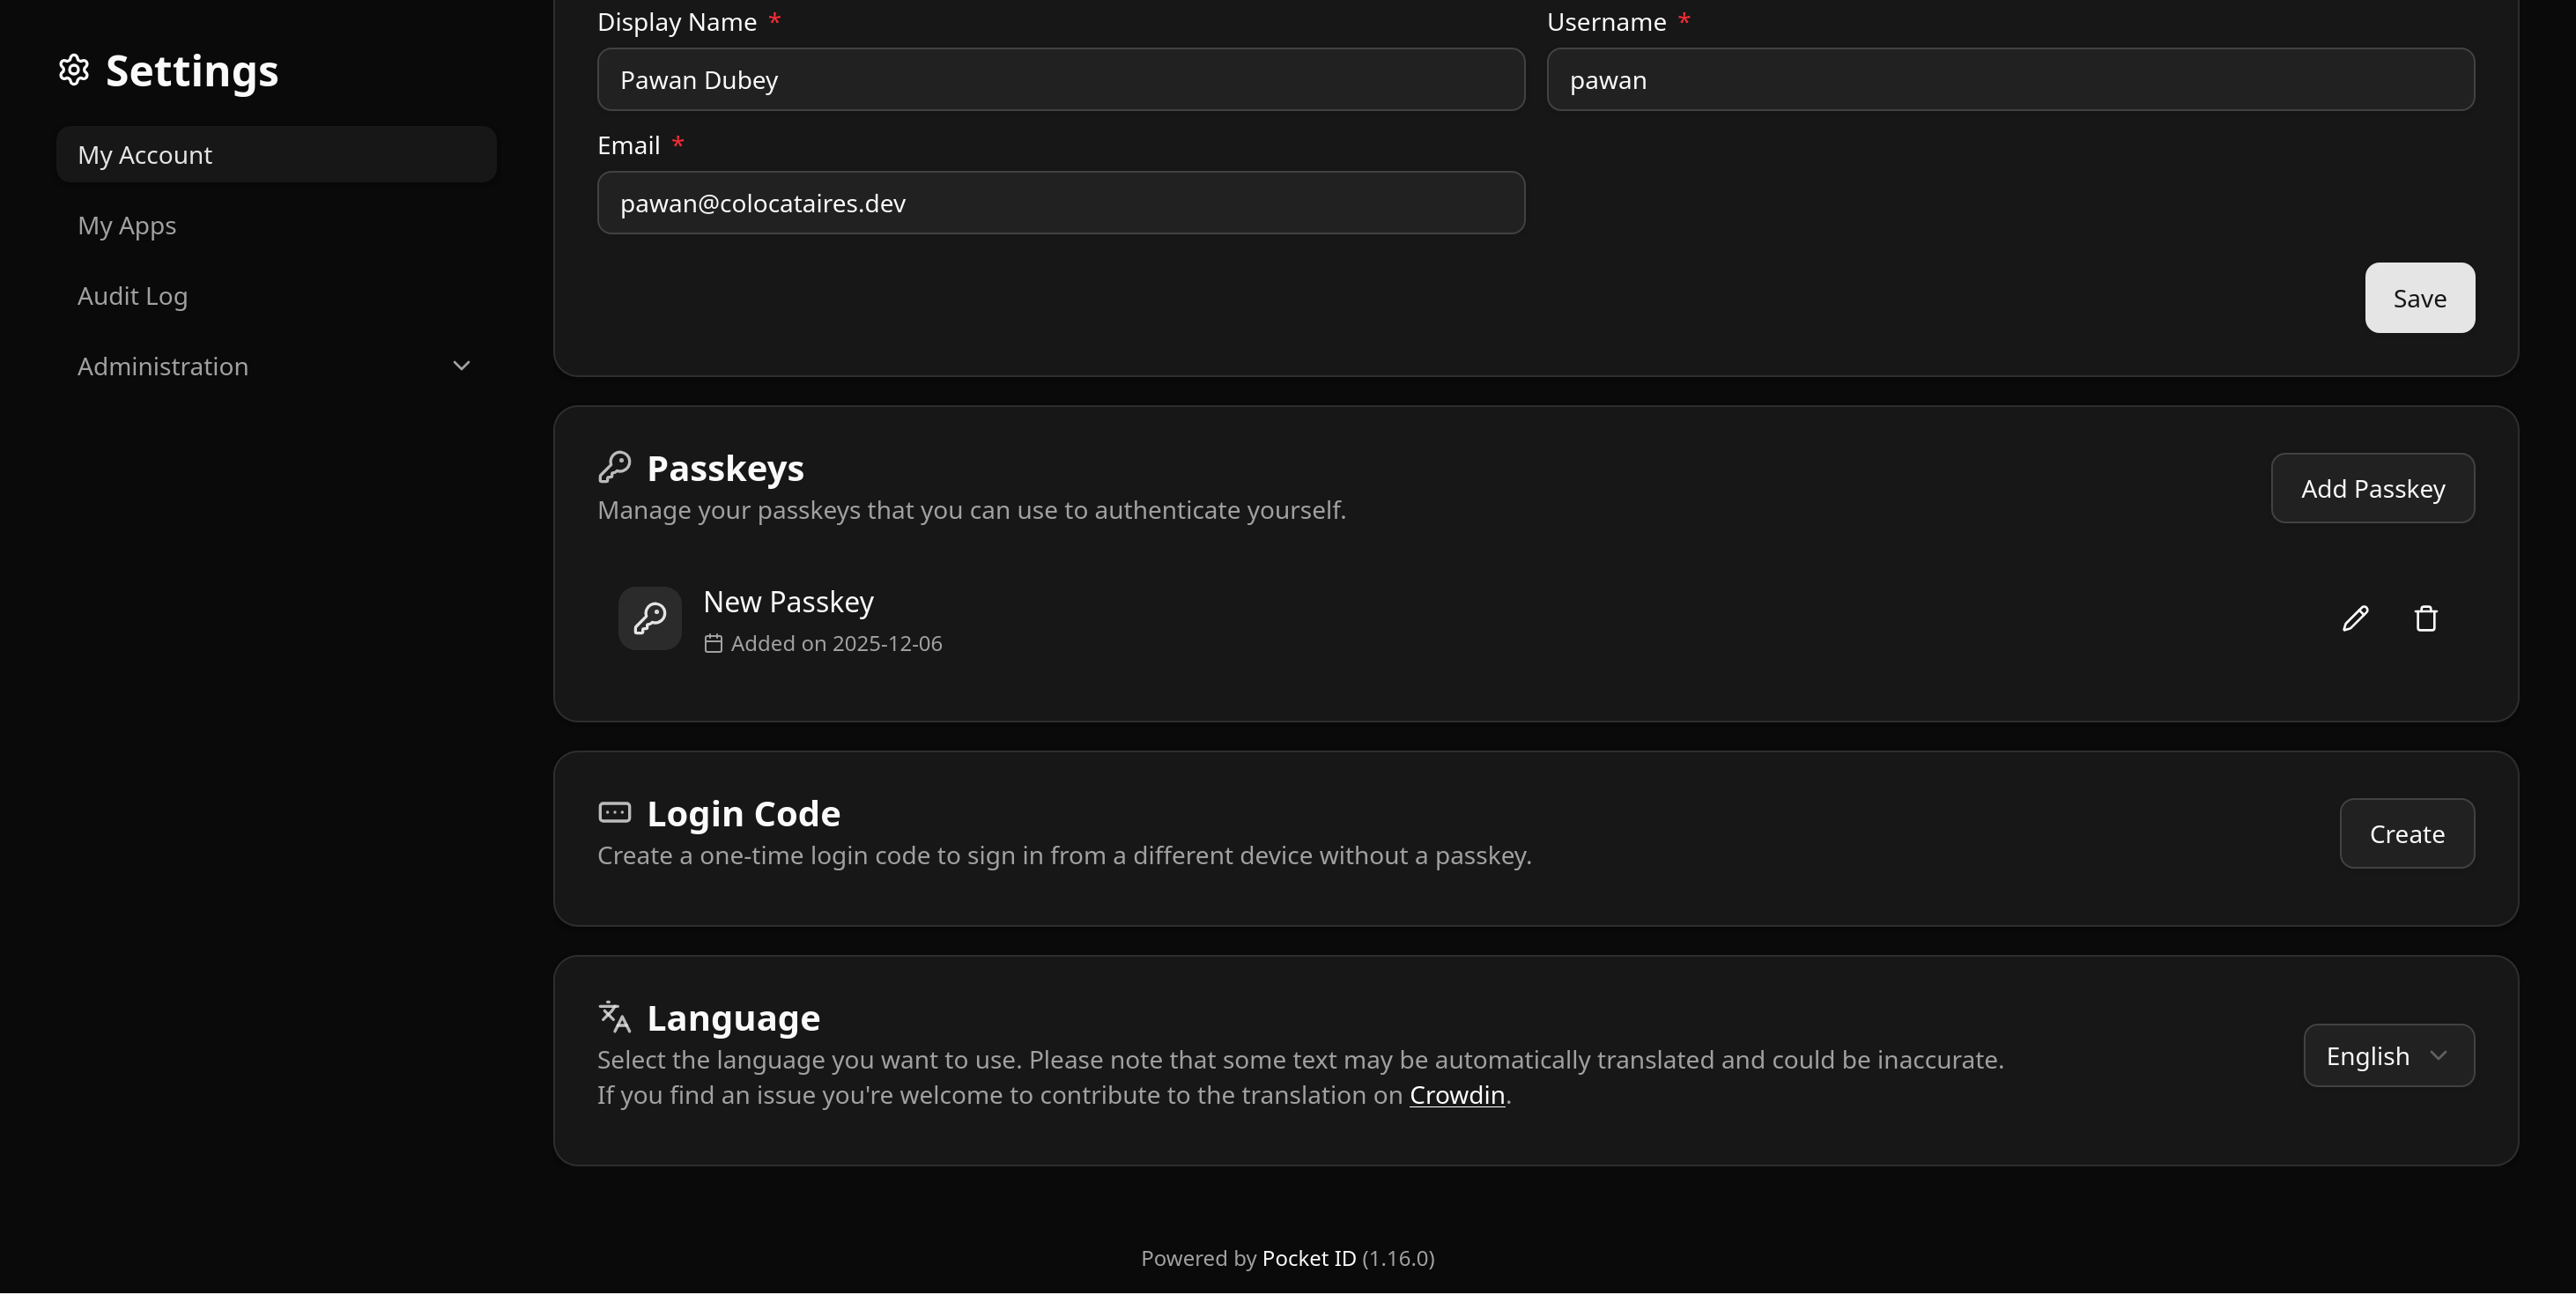
You will be taken to the account details page and Pocket ID will prompt you to register more than one passkeys, and I can back that recommendation up!
New passkeys can be added on this page. You can also rename existing passkeys for easier identification, and change your details and profile image etc.
Now that we have set up the auth details, we can test signing in using the passkey.
In an incognito window, open the pocket ID domain (for me that was auth.sh.pawan.link) as we had set it up above:

Clicking on Authenticate will prompt you for your authenticator by the browser. It will look different depending on the authenticator you chose to set up for your passkeys. I used a Yubikey so it looks like this on Firefox:
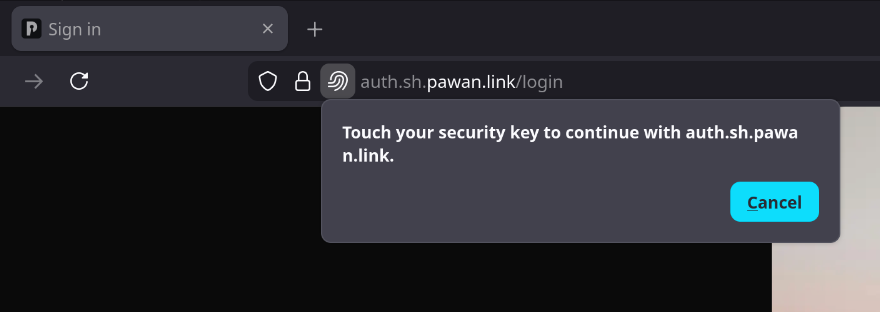
By triggering the key (either by touching the Yubikey or your mac’s TouchID etc. based on your chosen passkey), you should be authenticated by Pocket ID. 🎉
Configuration
Pocket ID’s Administration > Application Configuration page includes some customization options like changing the accent colours and images used in the UI as well as some auth related options.
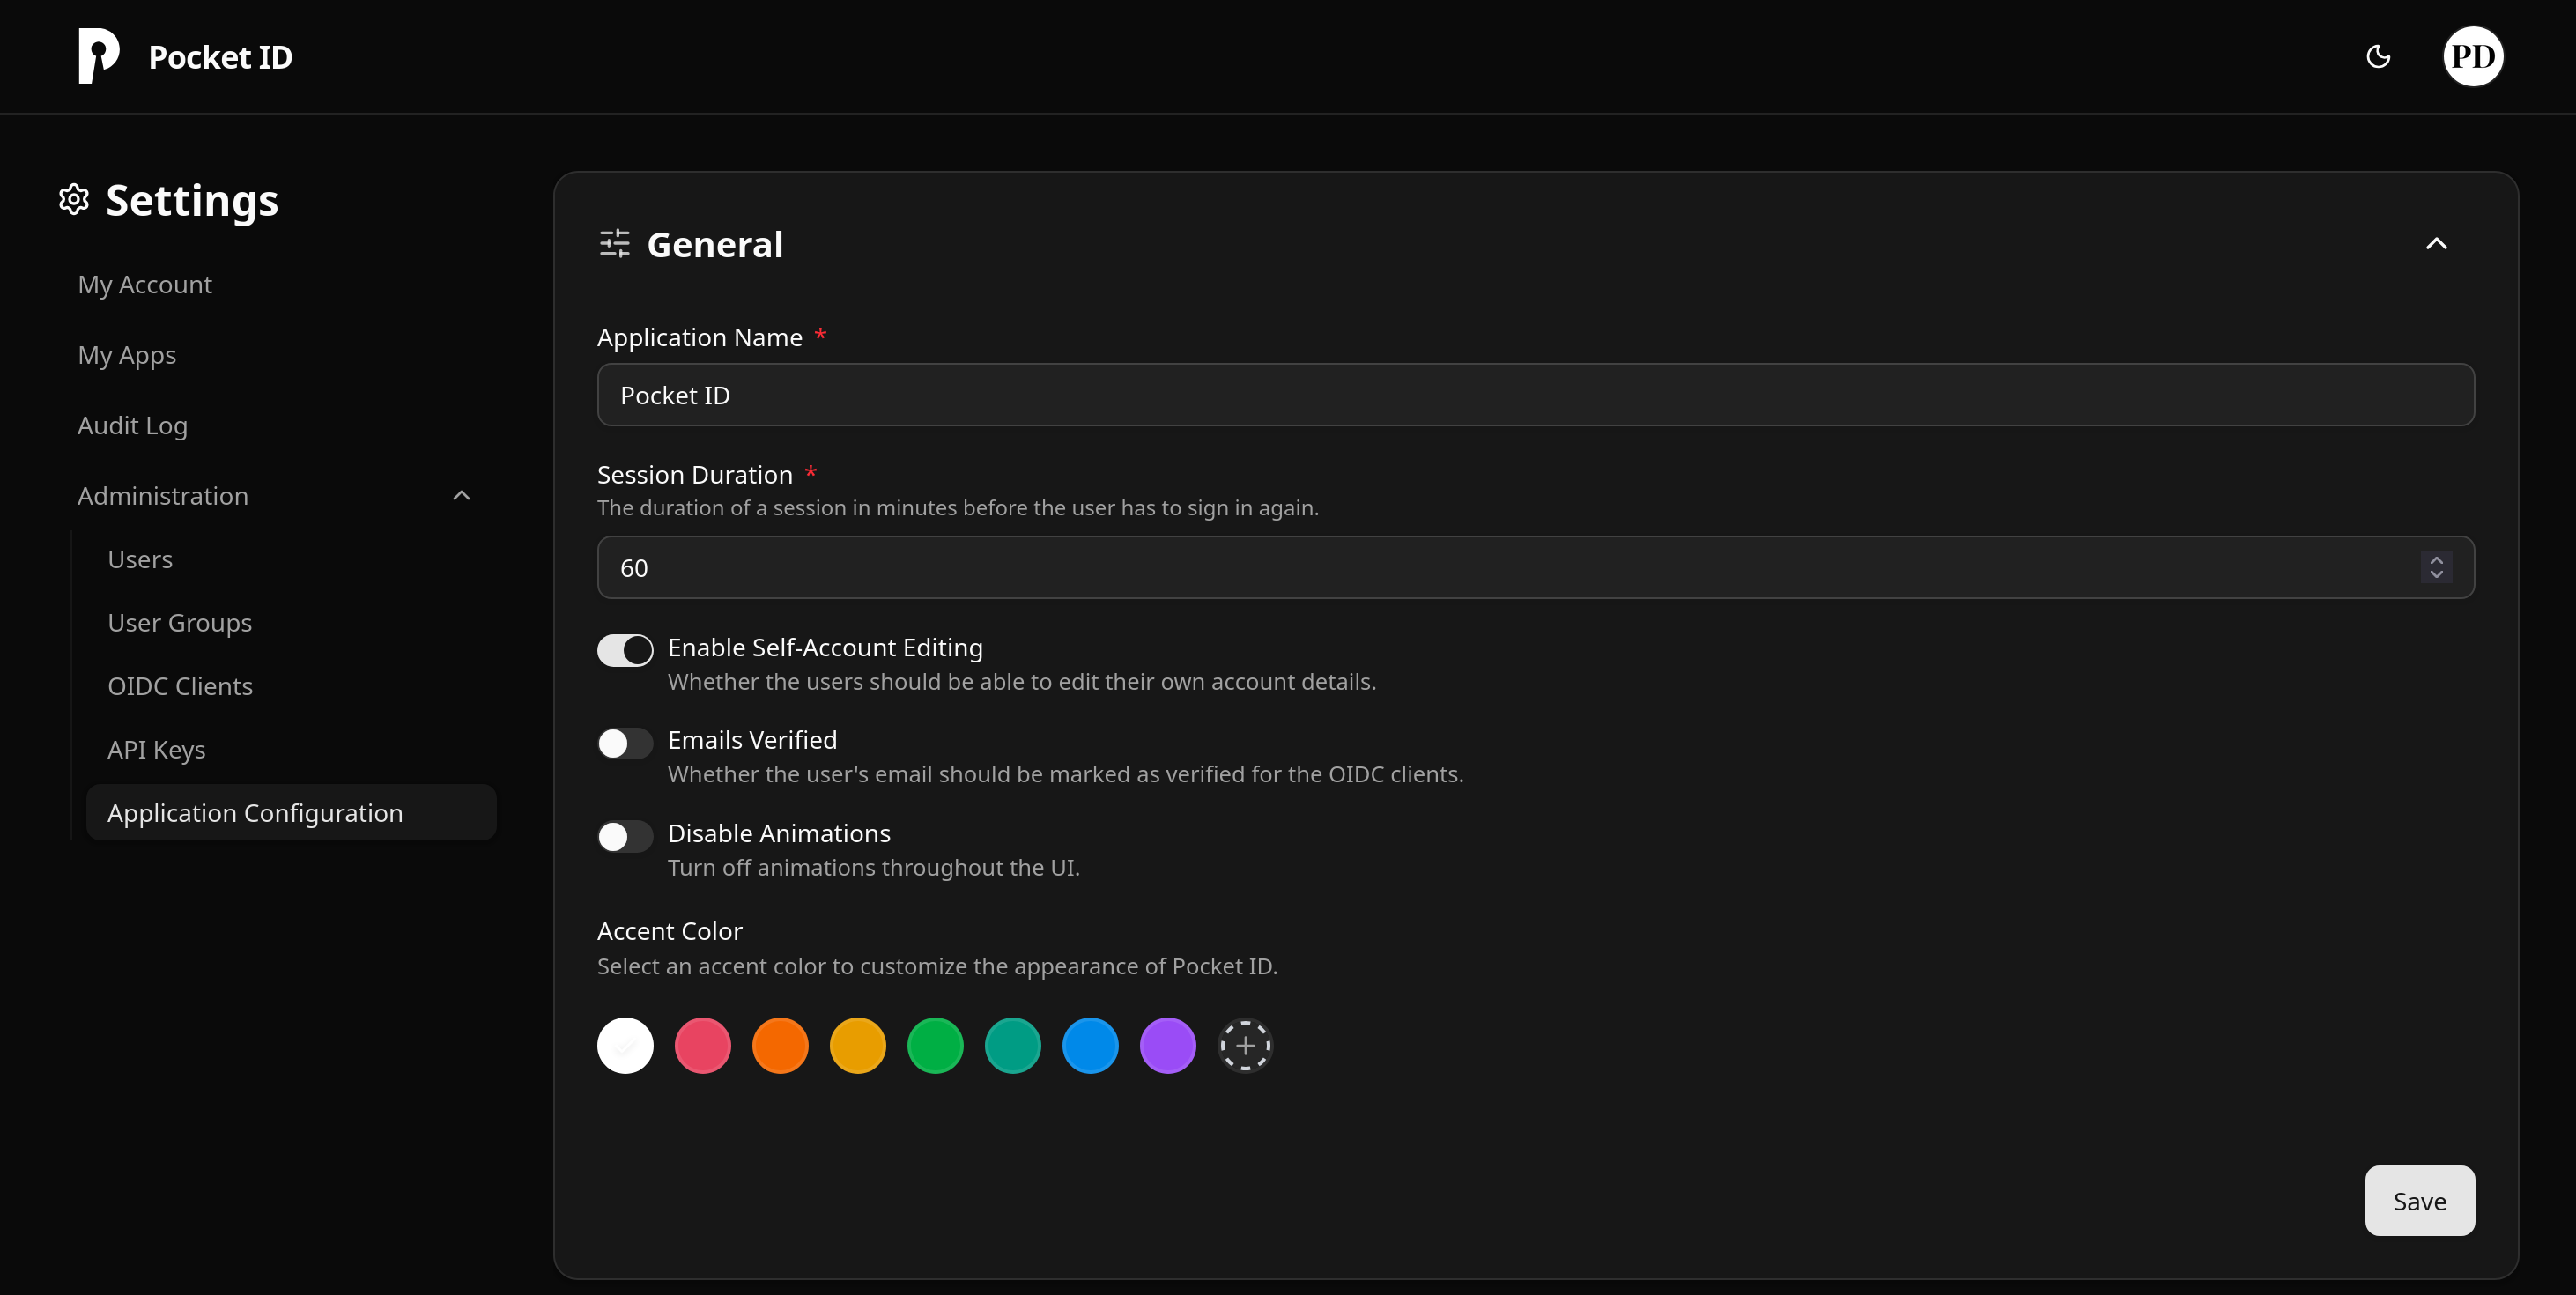
We can also create OIDC clients in this section, something we will use in a future post 🔜 (stay tuned!)
Conclusion
So that was the setup for Pocket ID! We (read: I) spent way too much time talking about the theory compared to the time it took to actually have that server up and running. It’s a testament to Pocket ID’s simplicity that it was so quick to get it up and running. Of course, we benefit from our past work with caddy and docker on this too.
And that’s it for today! Like I have already mentioned only thirteen times so far: we will be using this to authenticate into some of our future services. Take a look at the official documentation for the full set of features.
Thanks for reading this far, and follow along for future posts in #Self-hostember . You can now follow us on Mastodon to keep up to date with us as well!